> ## Documentation Index
> Fetch the complete documentation index at: https://docs.cyborg.co/llms.txt
> Use this file to discover all available pages before exploring further.
# Getting an API Key
To use CyborgDB, you'll need an API key that authenticates your requests and determines your service capabilities. This guide will walk you through the process of signing up and generating your API key.
## Overview
CyborgDB offers both free and paid API keys:
*Perfect for evaluation and testing*
* Up to 1M vectors maximum
* Community support
*Full production capabilities*
* Access to `cyborgdb-core` features
* Unlimited items and vectors
* All backing stores (PostgreSQL, Redis, Memory)
* GPU acceleration support
* Priority support
***
## Step-by-Step Guide
Visit [cyborgdb.co](https://cyborgdb.co) and create your account.
1. Click **"Sign Up"** in the top navigation
2. Enter your email address and create a secure password
3. Verify your email address by clicking the link sent to your inbox
4. Complete your profile setup
Your account starts with access to free API keys by default.
If you need production capabilities, upgrade to a paid plan.
1. Navigate to the **"Billing"** section in your dashboard
2. Review the available plans and features
3. Select the plan that best fits your needs
4. Complete the payment setup
**Plan Disclosure**: Paid plans unlock `cyborgdb-core` with unlimited vectors, GPU acceleration, and all backing stores. Free plans have a 1M item limite per index. You can always start free and upgrade later.
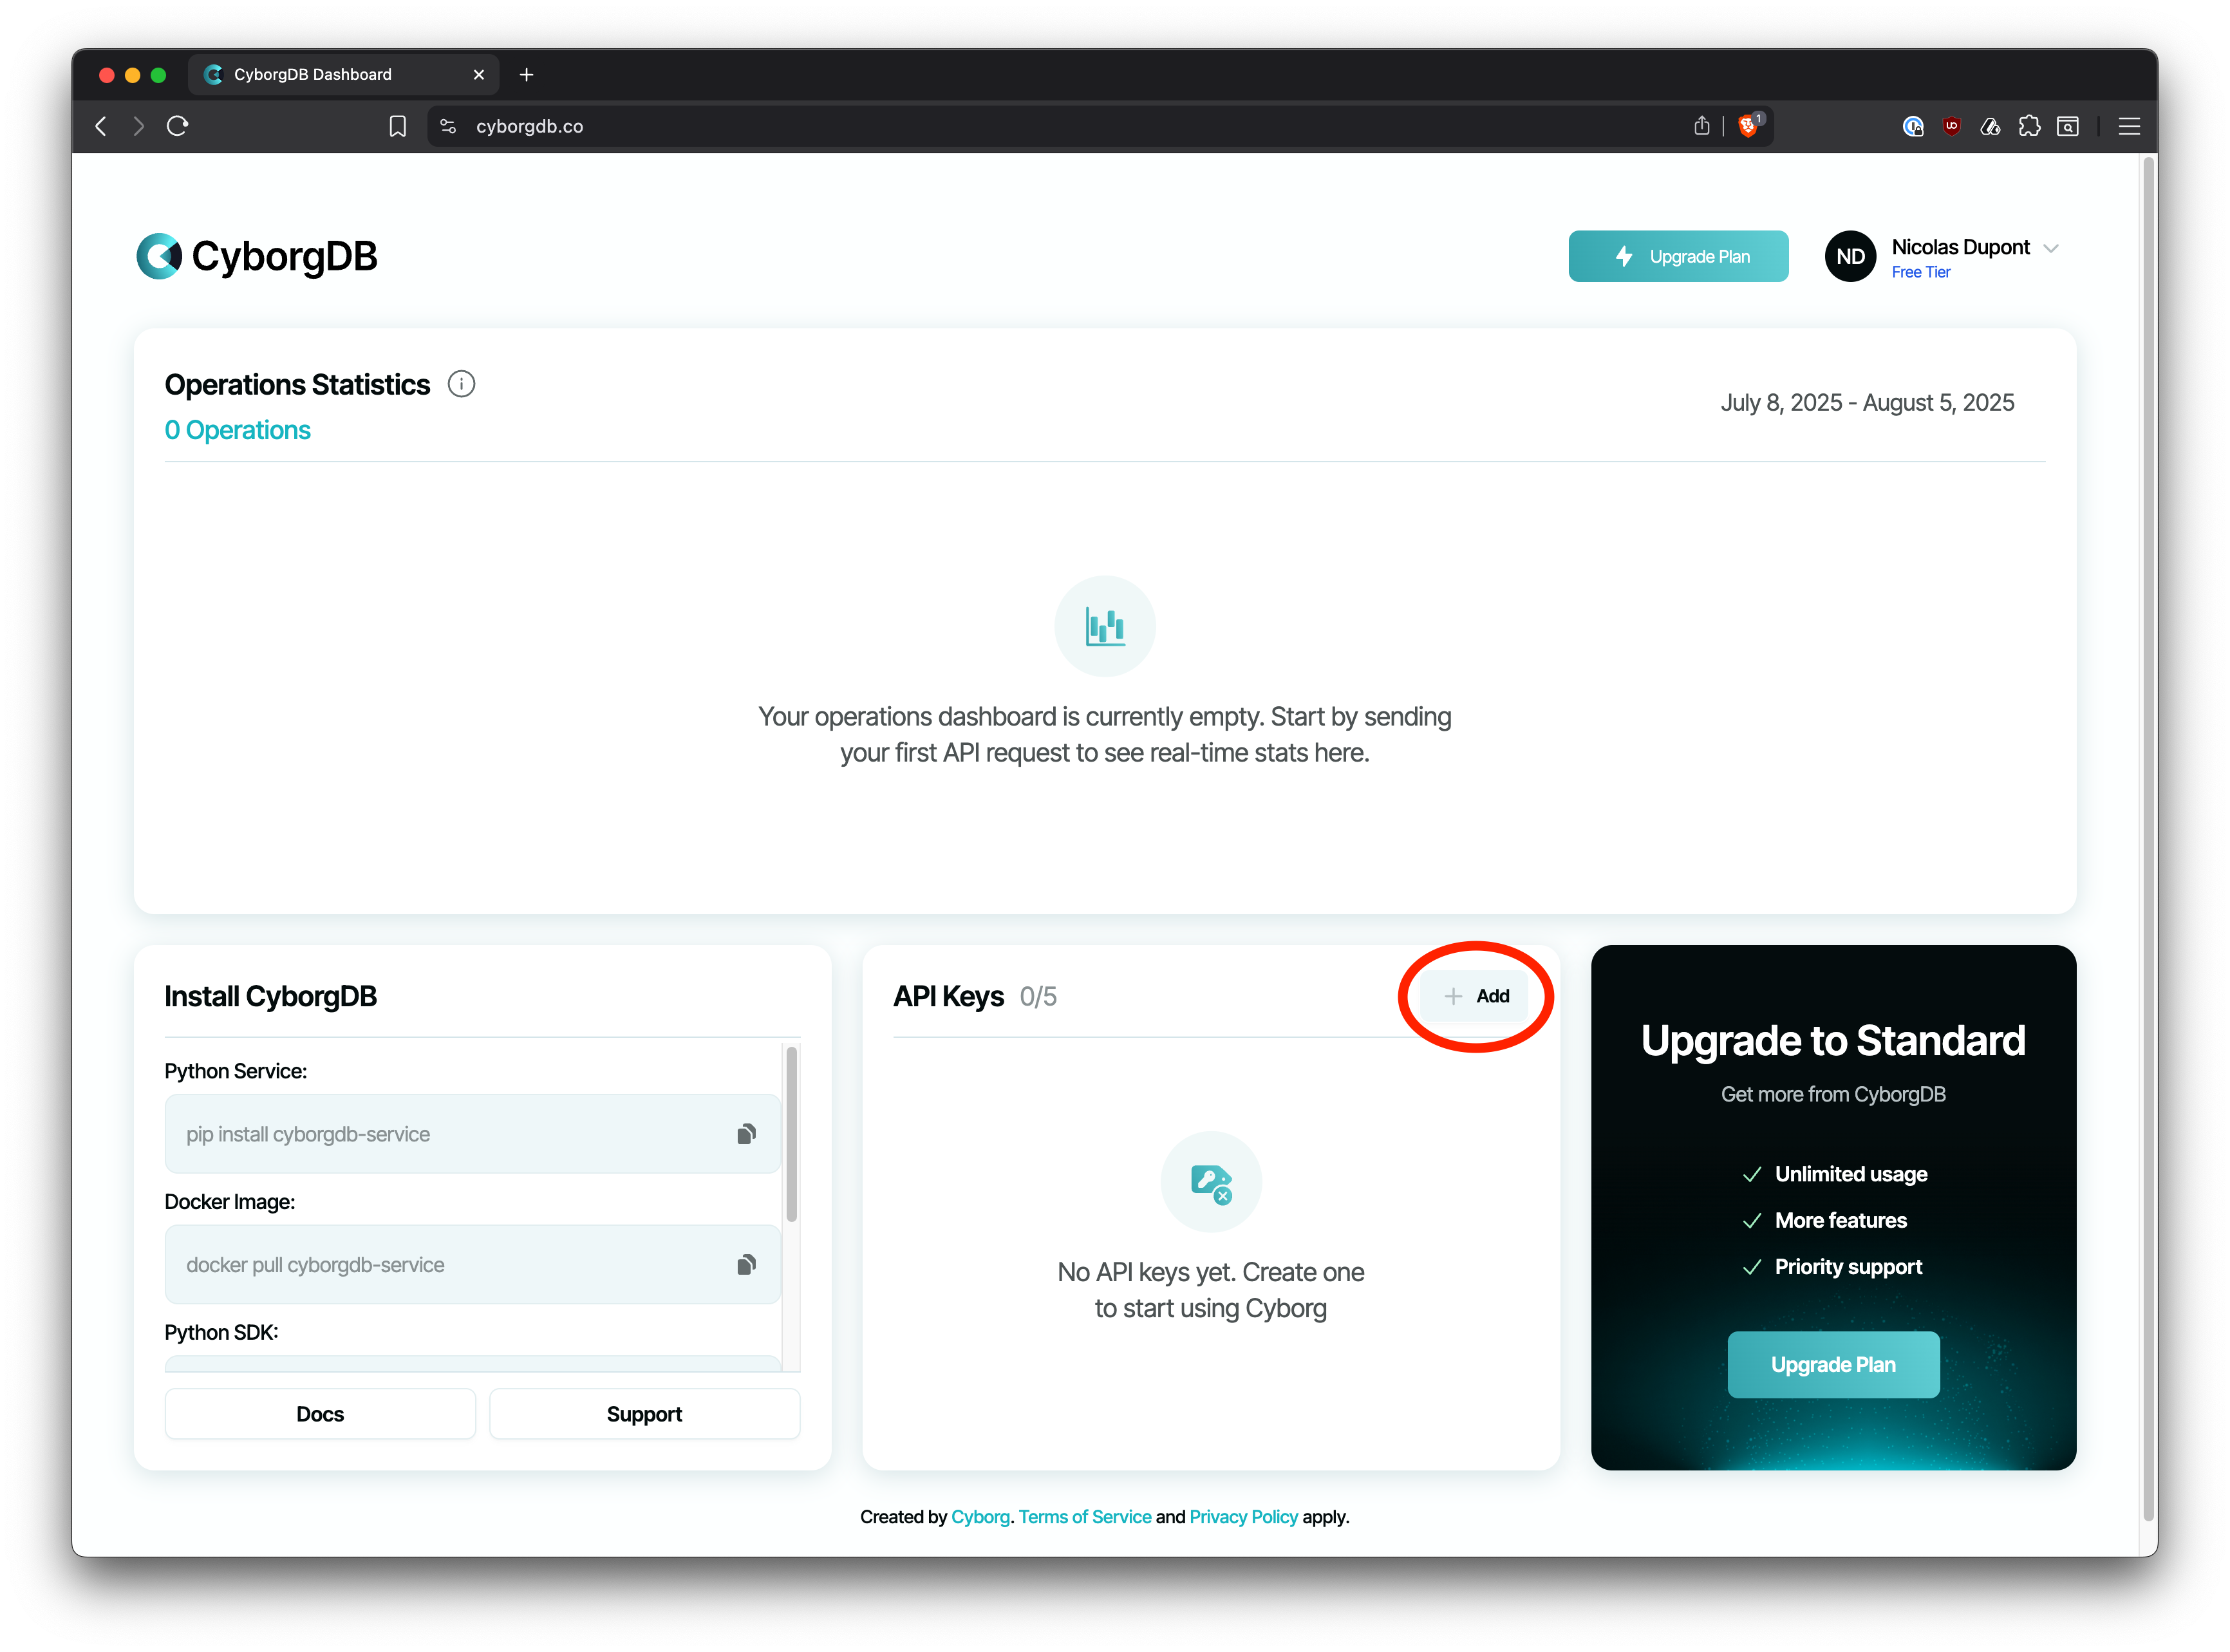
Create a new API key from your dashboard.
1. In your CyborgDB dashboard, locate the **"API Keys"** section
2. Click the **"Add"** button next to "API Keys"
 Your API key will be generated and displayed.
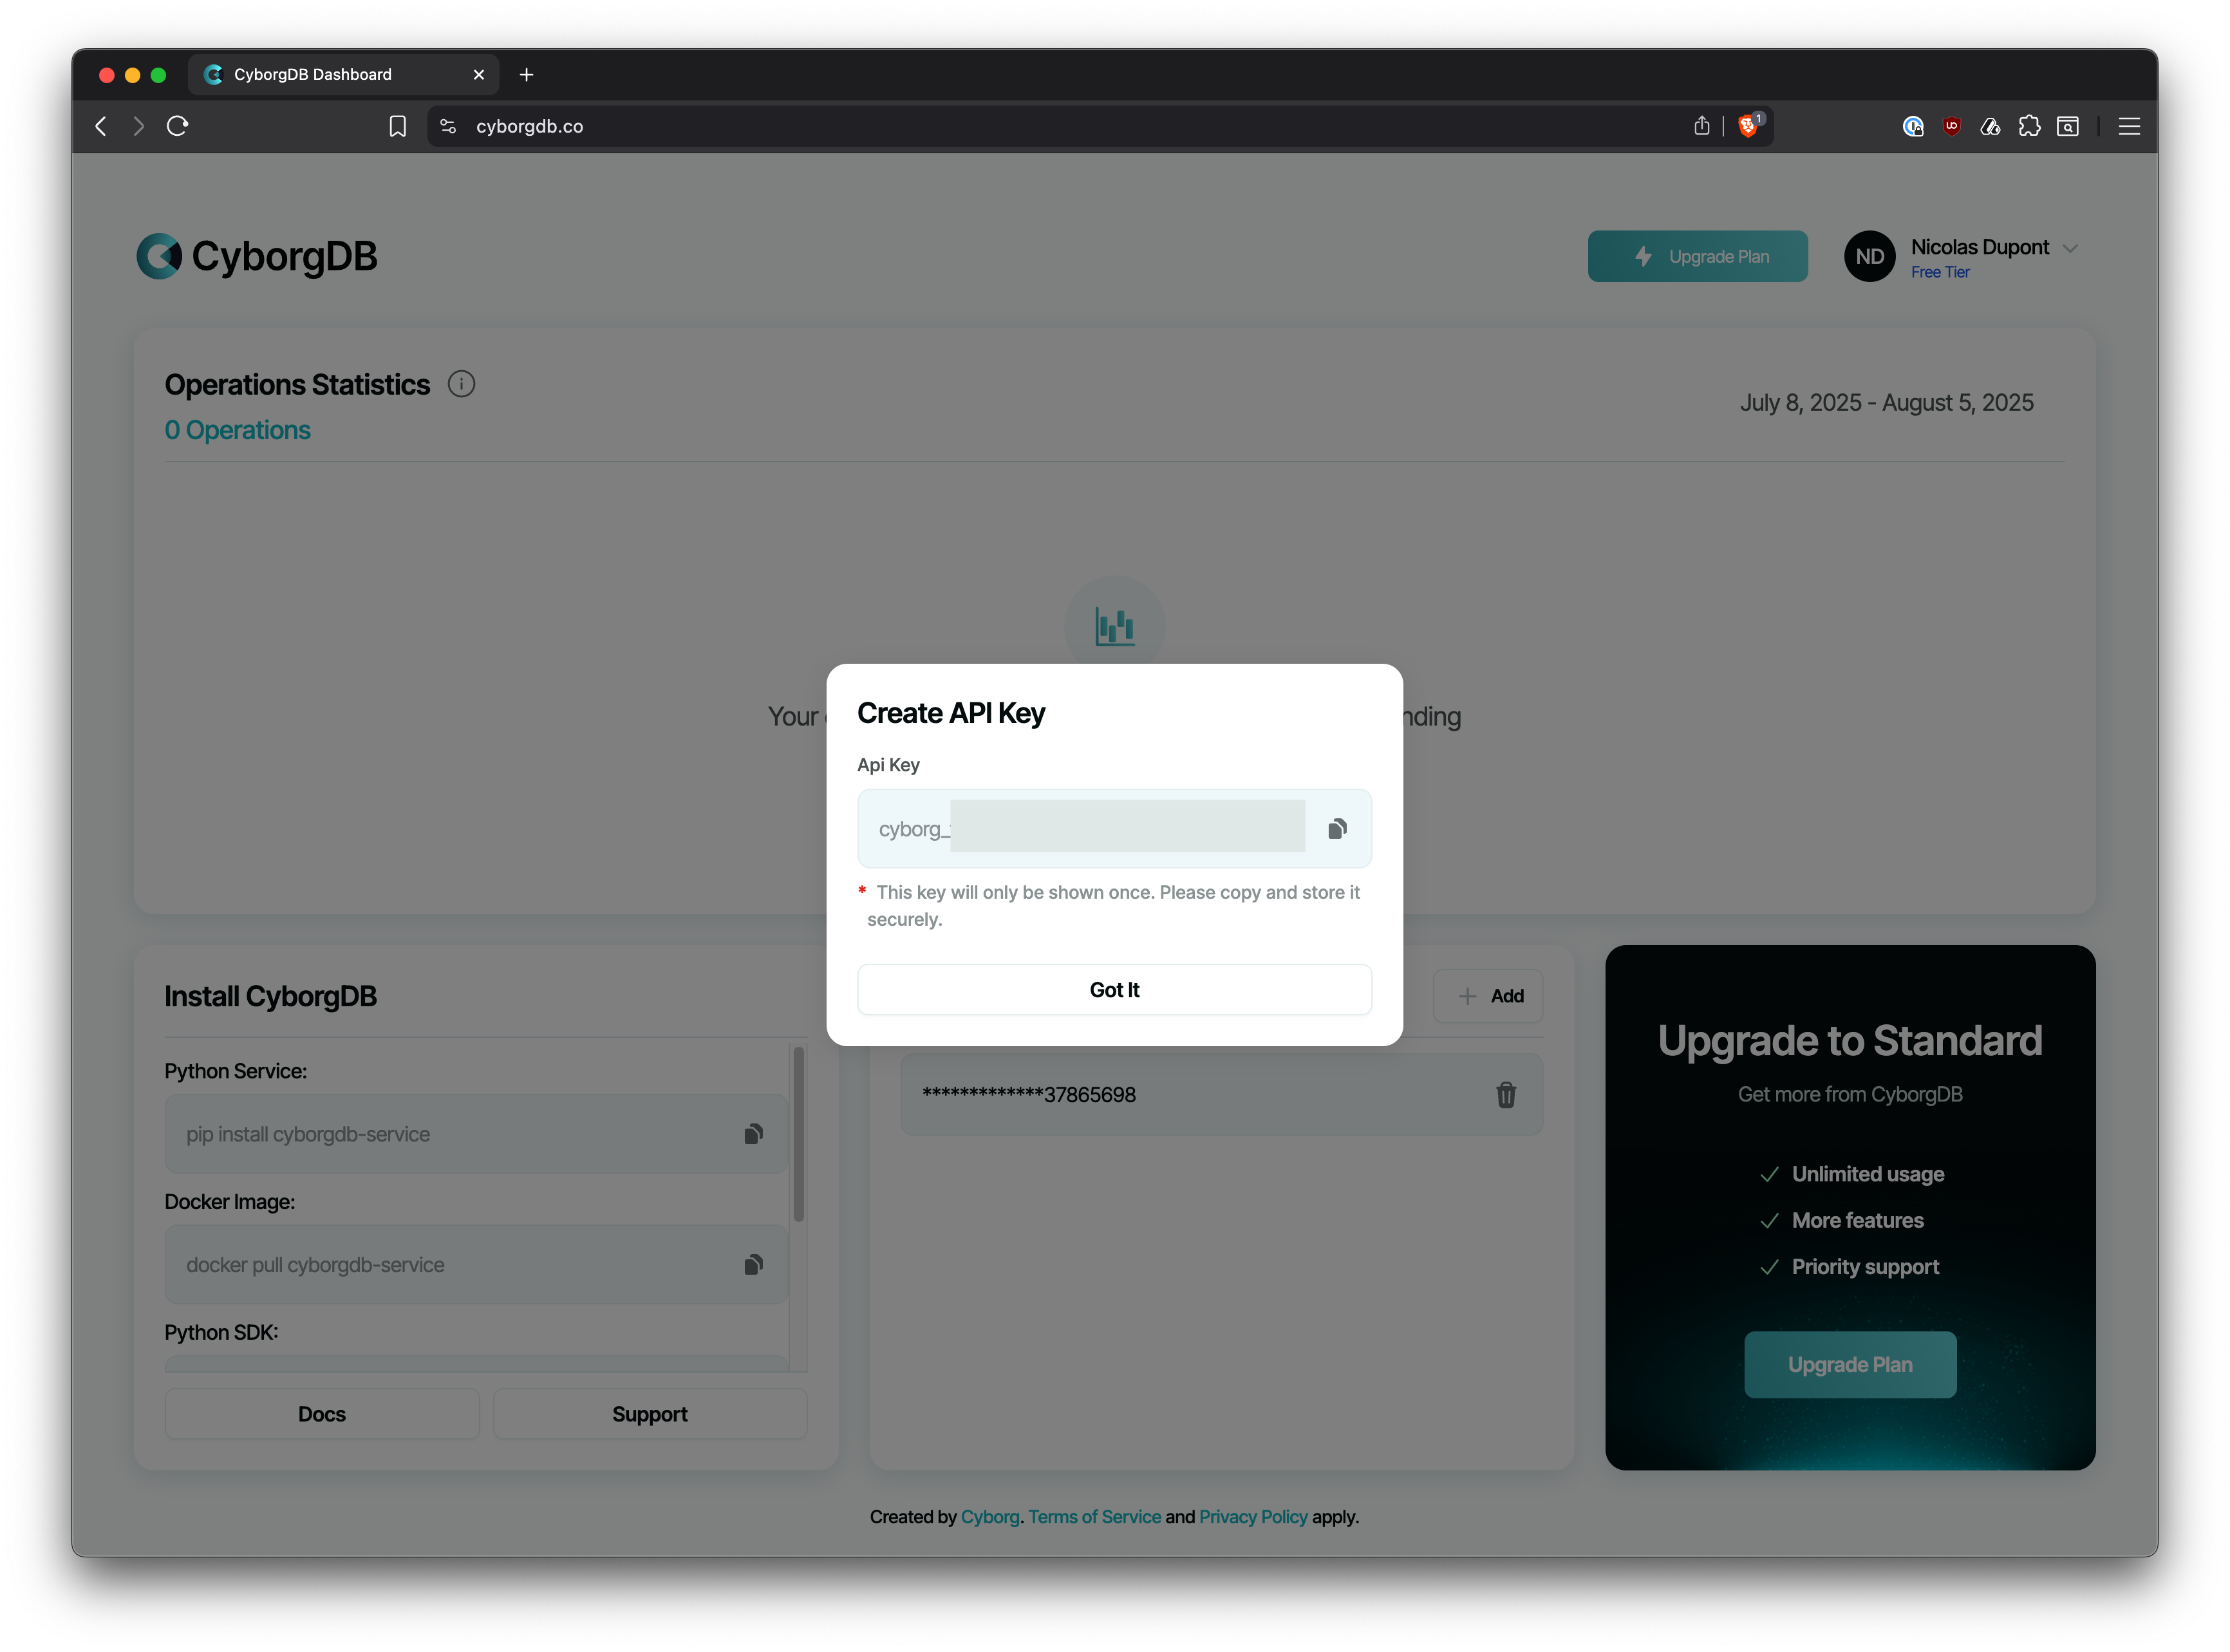 **Important**: Copy your API key immediately and store it securely. For security reasons, you won't be able to see the full key again after leaving this page.
**Best Practices:**
* Store your API key in environment variables, not in your code
* Never commit API keys to version control
* Use different keys for development and production environments
* Rotate keys regularly for enhanced security
***
## Using Your API Key
Once you have your API key, you can use it with any CyborgDB deployment:
Set your API key as an environment variable:
```bash theme={null}
export CYBORGDB_API_KEY="your-api-key-here"
```
Then reference it in your code:
```python theme={null}
import os
from cyborgdb_core import Client
client = Client(api_key=os.getenv("CYBORGDB_API_KEY"))
```
Use your API key directly in your code (not recommended for production):
```python theme={null}
from cyborgdb_core import Client
client = Client(api_key="your-api-key-here")
```
Store in a configuration file that's excluded from version control:
```python theme={null}
# config.py (add to .gitignore)
CYBORGDB_API_KEY = "your-api-key-here"
# main.py
from config import CYBORGDB_API_KEY
from cyborgdb_core import Client
client = Client(api_key=CYBORGDB_API_KEY)
```
***
## Managing Your API Keys
### Dashboard Management
From your CyborgDB dashboard, you can:
* **View all API keys** - See all keys associated with your account
* **Create new keys** - Generate additional keys for different projects
* **Revoke keys** - Disable keys that are no longer needed
* **Monitor usage** - Track API key usage and performance
***
## Next Steps
*Jump into the quickstart guide*
Use your new API key to get started with CyborgDB
*Service vs Embedded*
Decide between CyborgDB Service or Embedded libraries
*LangChain integration*
Replace your existing vector store with CyborgDB
Got your API key? You're ready to start building confidential AI applications!
**Important**: Copy your API key immediately and store it securely. For security reasons, you won't be able to see the full key again after leaving this page.
**Best Practices:**
* Store your API key in environment variables, not in your code
* Never commit API keys to version control
* Use different keys for development and production environments
* Rotate keys regularly for enhanced security
***
## Using Your API Key
Once you have your API key, you can use it with any CyborgDB deployment:
Set your API key as an environment variable:
```bash theme={null}
export CYBORGDB_API_KEY="your-api-key-here"
```
Then reference it in your code:
```python theme={null}
import os
from cyborgdb_core import Client
client = Client(api_key=os.getenv("CYBORGDB_API_KEY"))
```
Use your API key directly in your code (not recommended for production):
```python theme={null}
from cyborgdb_core import Client
client = Client(api_key="your-api-key-here")
```
Store in a configuration file that's excluded from version control:
```python theme={null}
# config.py (add to .gitignore)
CYBORGDB_API_KEY = "your-api-key-here"
# main.py
from config import CYBORGDB_API_KEY
from cyborgdb_core import Client
client = Client(api_key=CYBORGDB_API_KEY)
```
***
## Managing Your API Keys
### Dashboard Management
From your CyborgDB dashboard, you can:
* **View all API keys** - See all keys associated with your account
* **Create new keys** - Generate additional keys for different projects
* **Revoke keys** - Disable keys that are no longer needed
* **Monitor usage** - Track API key usage and performance
***
## Next Steps
*Jump into the quickstart guide*
Use your new API key to get started with CyborgDB
*Service vs Embedded*
Decide between CyborgDB Service or Embedded libraries
*LangChain integration*
Replace your existing vector store with CyborgDB
Got your API key? You're ready to start building confidential AI applications!